

首先,版本之间的匹配非常重要。
[En]
First of all, the matching between versions is so important.
先搞清楚自己的GPU支持的CUDA的版本我的MX150亲测可以支持10.1.150版本的CUDA。接着去看对应的CUDA的版本对应的tensorflow的版本是什么:
2022最新:TensorFlow各个GPU版本CUDA和cuDNN对应版本整理(最简洁)_hi_1900的博客-CSDN博客_tensorflow-gpu最新版
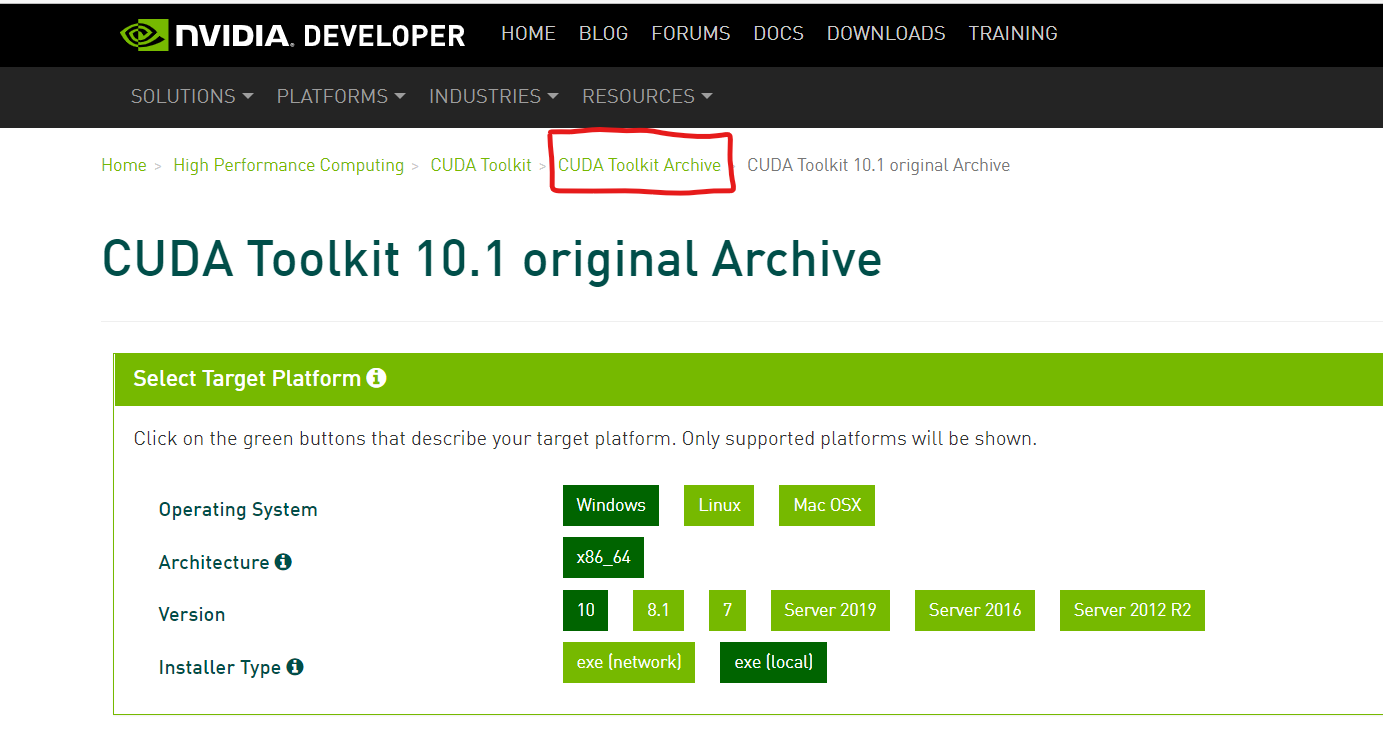
接着去英伟达的官网上下载对应的CUDA toolkit:
CUDA Toolkit 10.1 original Archive | NVIDIA Developer
Archive里面会有各个历史版本的CUDA下载,选local就是离线的安装包:

下好对应版本的CUDA之后,如果之前装了其他版本的CUDA,记得先在控制面板里卸载掉,虽然我不清楚是否有影响。
请注意,以下步骤不是选择安装位置,而是安装从包中提取的临时文件。安装后,此目录的内容将自动删除。
[En]
Note that the following step is not to select the location of the installation, but to install the temporary files extracted from the package. After installation, the contents of this directory will be deleted automatically.
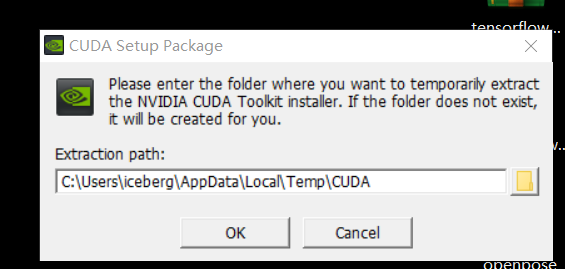
然后跟着提示把CUDA toolkit给安装上,安装的过程中可以点自定义安装,选择安装的位置,否则默认安装在C盘。如果你显卡的驱动没有安装也没关系,CUDA toolkit里面带有一个对应的最小版本的显卡驱动。
装好CUDA toolkit后,可以在环境变量里面看到有关CUDA的路径,还可以用命令行检查是否成功安装:
nvcc --version
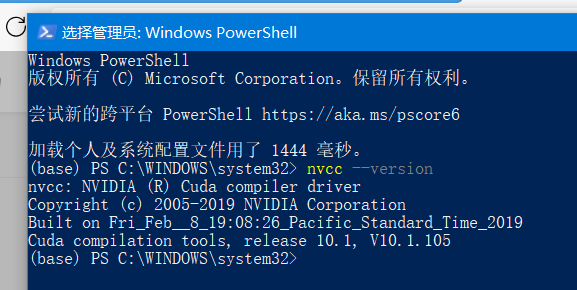
以上完成,那么CUDA toolkit的安装就完成了。
然后到tensorflow的部分,找到对应CUDA版本的tensorflow版本,我的对应CUDA10.1的tensorflow版本是2.3.0,对应的python版本是3.5到3.8,我用的是anaconda3来管理虚拟环境,于是:
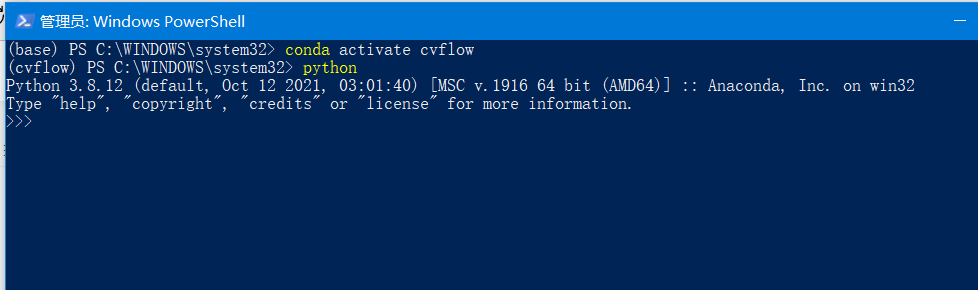
powershell中建立虚拟环境,cvflow是我自己定的环境名:
conda create cvflow
构建虚拟环境后,激活该虚拟环境。如果激活成功,您可以在括号中看到虚拟环境的名称:
[En]
After the virtual environment is built, activate the virtual environment. If the activation is successful, you can see the name of the virtual environment in parentheses:
conda activate cvflow
然后,我用pip来下载安装tensorflow和其他的常用的python包。为什么用pip而不用anaconda呢?因为我在anaconda上下的tensorflow的版本无法切换,也许是我自己电脑的问题。在此之前我把pip的源换到aliyun,之前换到过清华源,但是下载完后会一行红色的字报错,aliyun不会。这会比默认的源下载更快,换源参考:
然后powershell输入命令安装tensorflow的指定版本,2.3.0的GPU版本:
pip install tensorflow-gpu==2.3.0
之后再按需把matplotlib等一些常用包安上:
pip install matplotlib
我的代码里有用到keras的部分,虽然tensorflow里已经集成了keras,但是我不知道它的版本,为了精确控制版本,我用pip独立安装了keras模块,这里注意,keras的版本也要和tensorflow的版本配合,见这里:
win10安装tensorflow2.3.0和对应2.4.3版本的keras_Cc1924的博客-CSDN博客_tensorflow2需要安装keras吗
到这一步,就可以去power shell里用以下命令测试CUDA是否能运行了:
先激活虚拟环境:
conda activate cvflow
进入python的输入界面:
然后输入:
import tensorflow as tf
print(tf.__version__)
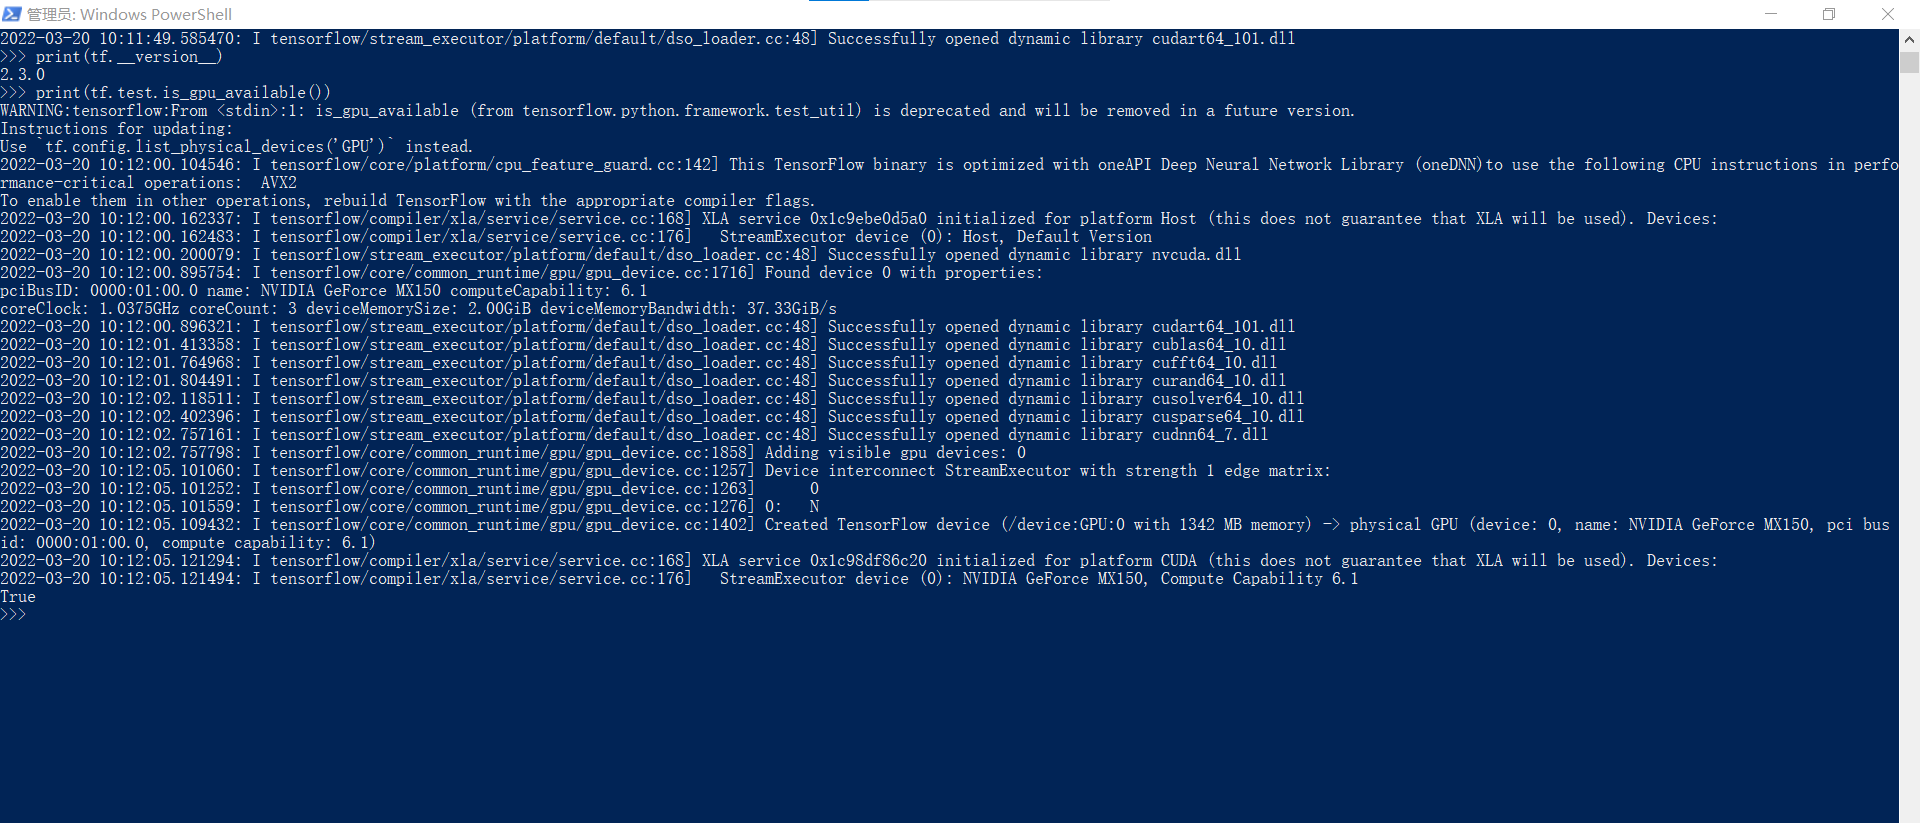
print(tf.test.is_gpu_available())
这时如果CUDA正常工作,会在一长串东西之后最后返回一个True,但是当时我并没有成功,检查了中间的消息,发现是缺少了一个cudnn64_7.dll文件,这里有解决方案:
(20条消息) 解决Could not load dynamic library ‘cudnn64_7.dll’; dlerror cudnn64_7.dll not found_鸭梨的药丸哥的博客-CSDN博客_cudnn64_7.dll官网下载这个东西需要注册一个NVIDIA的账户,注册就是了
然后,我们使用上面的测试代码再次测试它,它可以工作:
[En]
Then we test it again with the above test code, and it works:
经过几天的摸索,我终于找到了。
[En]
After several days of groping, I finally got it.
我用的是小米笔记本13寸和我的另一个用huawei笔记本的室友一起鼓捣,他最后怎么都搞不出来,最后发现他当时买的是最低配的集显本,没有独立显卡
Original: https://blog.csdn.net/Little_Ganer/article/details/123607722
Author: iceberg.hbs
Title: 安装tensorflow+CUDA全过程记录
原创文章受到原创版权保护。转载请注明出处:https://www.johngo689.com/496843/
转载文章受原作者版权保护。转载请注明原作者出处!